Report, edit, etc...Posted by Centreri on 2006-11-29 at 18:15:42
Well, I know the vast majority of us sig-makers and such use Photoshop to do wonders, so I thought I'd make a topic for everyone to share their deepest darkest secrets. Please include an image of an outcome and a tutorial on how to achieve the effect. Hopefully this will help newbier (me included) photoshoppers get better.
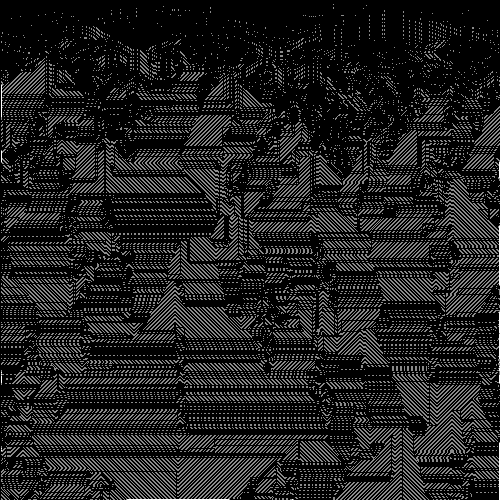
I'll start off: Technique to make custom tech-lines.
Tutorial:
1) Open document. 500x500 is fine. Color mode doesn't matter.
2) Black/White colors. Filter-Render-Clouds.
3) (optional - I used for the image above, but it turns out differently with this off) Filter-Render-Difference Clouds.
4) Apply anything from the Filter-Distort category. For the above, I used Polar Coordinates. Multiple filters encouraged.
5) Filter-Stylize-Wind. Method - Wind. Direction - From the right.
6) Rotate 90 degrees in any direction.
7) Repeat steps 5 and 6 until you have winded in all four directions and your image is sided the same way it was before you rotated it. You must have rotated it 90 degrees 4 times.
7) Stylize-Find Edges.
8) Stylize-Glowing Edges. Edge Width - 1. Edge Brightness - 20. Smoothness - 1.
Viola.
Depending on the contrast of resulting image after step 7, you might have to drop out step 7. Sometimes image isn't contrasted enough, colors being too consistent, and 7 just makes the whole image white. You can also add in a sharpen before step 5.
And just as an interesting effect, try using 'Glowing Edges' at same settings about 10 times - you'll end up with a ton of black/white noise. More square-like then default noise. Maybe lower the contrast, put at 20% opacity, and use as overlay for background of a signature?
Here's another example of this being used in a signature. Don't blame the poor sig quality on the technique .
.

Share your deepest darkest secrets!
EDIT: Oh, and you can comment/ask questions about techniques as well. I don't want a near-empty thread .
.
I'll start off: Technique to make custom tech-lines.
Tutorial:
1) Open document. 500x500 is fine. Color mode doesn't matter.
2) Black/White colors. Filter-Render-Clouds.
3) (optional - I used for the image above, but it turns out differently with this off) Filter-Render-Difference Clouds.
4) Apply anything from the Filter-Distort category. For the above, I used Polar Coordinates. Multiple filters encouraged.
5) Filter-Stylize-Wind. Method - Wind. Direction - From the right.
6) Rotate 90 degrees in any direction.
7) Repeat steps 5 and 6 until you have winded in all four directions and your image is sided the same way it was before you rotated it. You must have rotated it 90 degrees 4 times.
7) Stylize-Find Edges.
8) Stylize-Glowing Edges. Edge Width - 1. Edge Brightness - 20. Smoothness - 1.
Viola.
Depending on the contrast of resulting image after step 7, you might have to drop out step 7. Sometimes image isn't contrasted enough, colors being too consistent, and 7 just makes the whole image white. You can also add in a sharpen before step 5.
And just as an interesting effect, try using 'Glowing Edges' at same settings about 10 times - you'll end up with a ton of black/white noise. More square-like then default noise. Maybe lower the contrast, put at 20% opacity, and use as overlay for background of a signature?
Here's another example of this being used in a signature. Don't blame the poor sig quality on the technique
.Share your deepest darkest secrets!
EDIT: Oh, and you can comment/ask questions about techniques as well. I don't want a near-empty thread
.Report, edit, etc...Posted by Jin on 2006-11-29 at 18:42:40
Should be pinned.
AWESOME Technique
--------------------
Photoshop
• Lens Flare
1. Make a 600x600 image
2. Make a black background
3. Place 4 lens flare on the edges, one in each (Default settings)
4. Filter > Sketch > Chrome (Detail 10, Smoothness 0)
5. Duplicate layer
6. Distort twil -530 (Layer 1)
7. Distort twil 530 (Layer 2)
8. Set Layer 2 as blend mode Difference
9. Put some colors
Report, edit, etc...Posted by Centreri on 2006-11-29 at 18:54:30
Thanks. Just experimented and found this. I think I also used this technique to create the glowing rune-like area on a black background you see in the signature on the sides, but I have been unable to recreate it.
EDIT: Nice effect.. looks cool. I should learn to use chrome.
EDIT: Nice effect.. looks cool. I should learn to use chrome.
Report, edit, etc...Posted by Jin on 2006-11-29 at 20:11:07
Photoshop
Gradient
1. Make a image 500x200
2. Select gradient tool, set opacity 90%, choose any gradient (blend difference)
3. Make as many as you want
4. Ctrl+Shift+U (Desature)
5. Ctrl+B (Colorize)
*I didn't use step 4 and 5 on this one

You can make things much more amazing than this
Gradient
1. Make a image 500x200
2. Select gradient tool, set opacity 90%, choose any gradient (blend difference)
3. Make as many as you want
4. Ctrl+Shift+U (Desature)
5. Ctrl+B (Colorize)
*I didn't use step 4 and 5 on this one
You can make things much more amazing than this
Report, edit, etc...Posted by Oo.Jamal.oO on 2006-11-29 at 20:43:56
Shall we add Gimp tutorials too? I use Gimp..
(This was based off another tutorial, I just changed it around a bit.. So I claim no credit..)
1. Create a new white image (500x500)
2. Filter > Map > Map Object. Keep the default settings, but check "Transparent Backround" and where it says "Plane", set it to "Sphere".
3. Script-Fu > Alpha To Logo > Neon. Set the backround color to white, and the glow to black. Keep effect size at 150.
4. Delete the backround layer, and merge the rest.
5. Distorts > Emboss. Select Emboss, not Bumpmap.
Azimuth: 203.23
Elevation: 180.00
Depth: 30
6. Script Fu > Render > Lava. Set Seed and Size to 8. Change the gradient to "Golds".
7. Voila! It should like something like this.
Report, edit, etc...Posted by Hofodomo on 2006-11-29 at 20:49:44
Then again, you could always grab some photoshop brushes
http://paulw.deviantart.com/
This guy makes some pretty kickass photoshop tech brushes....DEFINITELY check em out...
Miscellaneous tip...
**If you ever want to make, let's say, your sig render character more vibrant...
>Duplicate character layer
>Filters>Blur>Gaussian blur>8-12px
>On the blurred layer...
>Set blending mode to screen (or overlay/soft light...play with it)
>Reduce opacity as desired
>Duplicate more layers, use different blur radii, use different blending modes...(to get different effects)
[original] [blurred]
Another technique...
**For a dark/dirtier/grungy feel
>Download this texture (it's a JPG)
>Resize it to whatever, and place it over your image
>Set the blending mode of the downloaded to texture to overlay/soft light (whichever looks better)
>Adjust blending as nessecary
[textured]
There's also nothing wrong with searching for 3D renders on the internet
Report, edit, etc...Posted by Centreri on 2006-11-29 at 20:52:48
I'd say any tool works. C4D, 3dmax, GIMP, Terragen.. Whatever you want. I just said Photoshop because it's the most widespread on SEN.
Report, edit, etc...Posted by Hofodomo on 2006-11-29 at 20:56:50
What about gimpshop? Good download....just like photoshop, but free
Report, edit, etc...Posted by Centreri on 2006-11-29 at 20:59:39
Yes, yes, all that.
Report, edit, etc...Posted by Jin on 2006-11-29 at 20:59:56
Idk, maybe make another topic for GIMP...
Report, edit, etc...Posted by Centreri on 2006-11-29 at 21:04:54
We don't need 15 pinned topics purely for techniques. One's enough. Fine, I'll rename the topic -.-.
Report, edit, etc...Posted by green_meklar on 2006-11-29 at 21:17:51
I found a number of interesting Photoshop techniques while I was using it. Unfortunately I don't have Photoshop right now (been using Gimp instead, I'm not as good with it yet as I am with Photoshop), so I can't verify that I got these right. However, some I found interesting:
Stacked gradients
1. Get some nice, bright, rainbow gradient with black on both ends
2. Set it to circular
3. Make a gradient on the image (optionally, you can also reverse the gradient)
4. Select all black
5. Repeat 3 to 4 until it looks good
6. If you like, shift the hue back and forth until it looks really good
Oversharpened
1. Clouds
2. Take the sharpen tool and wipe it all over the picture on and on and on until you've maxed it out
The result should look something like the first picture in this thread, only lighter and with some colors. Note that using the sharpen filter repeatedly will not have the same effect.
Neat text effect
1. Make some black text on a white background
2. Neon glow with a positive radius
3. Select the text (using select color, or alternatively have a selection saved if you like)
4. Neon glow with a negative radius
5. Invert the selection
6. Invert the colors
7. Craquelure (however you spell it)
8. Invert the colors again
I actually liked this one quite a bit, and if I had Photoshop on an computer with Internet access I would have made myself a 'green_meklar' title with it.
Fuzzy glowing ball
1. Make everything black
2. Make some white lines of various thicknesses going from one edge to the other, passing through the exact center of the image
3. Radial blur, a lot, in a circle rather than outwards
4. Optionally, add color (blue seems to work best)
I also had another technique which was something like 80 instructions long to make a randomly generated landscape, but I can't even come close to remembering it. Anyway, usually if I want a random landscape I just improvize filters until I get it right. When I do have one, one thing I like to do is put a perspective on it. Although, of course, now I have Terragen, so I guess using Photoshop (or Gimp) to make random landscapes is a little outdated. ;P
Report, edit, etc...Posted by Jin on 2006-11-30 at 06:29:16
So lets make a rule, you must say in BOLD size Large GIMP/Photoshop/w-e
Photoshop
Tutorial here...
Photoshop
Tutorial here...
Report, edit, etc...Posted by Centreri on 2006-11-30 at 15:22:30
Nah. These are essentially free tutorials, so I don't really want to restrict the submitters just to add a very minor plus to the readers.
Report, edit, etc...Posted by Oo.Insane.oO on 2006-11-30 at 16:27:54
QUOTE(Jin @ Nov 30 2006, 06:29 AM)
So lets make a rule, you must say in BOLD size Large GIMP/Photoshop/w-e
Photoshop
Tutorial here...
[right][snapback]597170[/snapback][/right]
Photoshop
Tutorial here...
[right][snapback]597170[/snapback][/right]
Most things you can do on gimp and photoshop just some of the steps are a little bit differnt but you can get similar outcomes